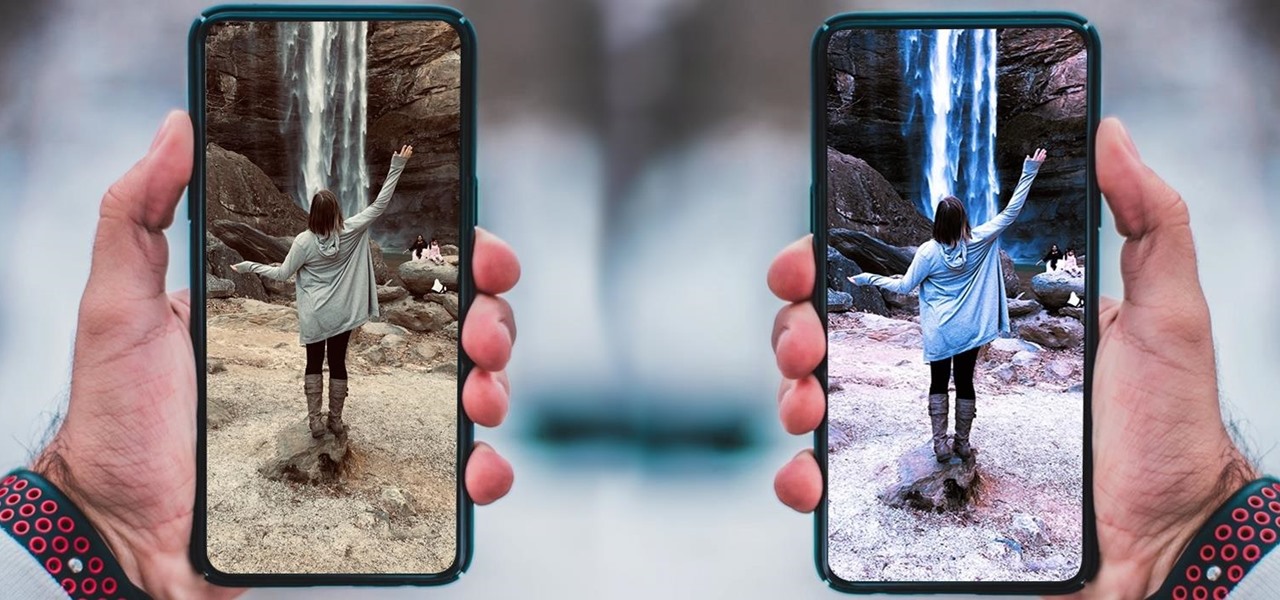

If you want your photos to look like they came straight out of a movie scene, the best method is to use split toning. Many Hollywood producers use this effect to recreate the cinematic look of cameras before the digital film era, which is why most people associate split toning with a cinematic feel.
Split toning is actually referencing an old photography technique from when photos were printed in black and white. In split toning, the photographer would add chemicals to the inks to create color effects. This early version of split toning was sepia tone. Later, more chemicals were added to inks to create two different colors in the darks and lights of the photo that act independently from one another, which was the beginning of split toning as we know it today.
Now, with digital photography, the process is quite different. We can add as many "ink" colors as we want to photographs with the touch of a button. Though much more complex, we can still get some pretty cool effects using this method digitally. The best option for split toning on mobile is to use Adobe's Photoshop Express, which is available on both iOS and Android.
Choose Your Color Scheme First
To successfully apply split tone to your photos, you first need to understand color and color combinations. Though there are many different types of color combinations, split toning in PS Express only allows you to use two colors, so we'll only be focusing on those types of combinations. There are three different types of successful color compositions that include only two colors:
- Complimentary: The colors precisely opposite each other on the color wheel.
- Analogous: Colors directly next to each other on the color wheel.
- Monochromatic: Choosing only one color on the color wheel but adding white or black to change the tone.

While proceeding with the next steps of split toning, reference the color wheel and color combinations above when choosing your colors. Don't be afraid to play around with a few different ones.
Method 1: Start with a Black & White Image
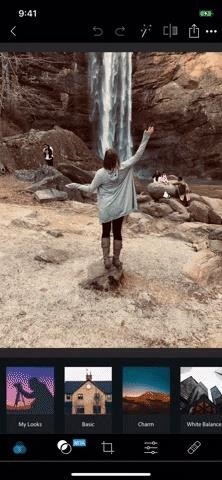
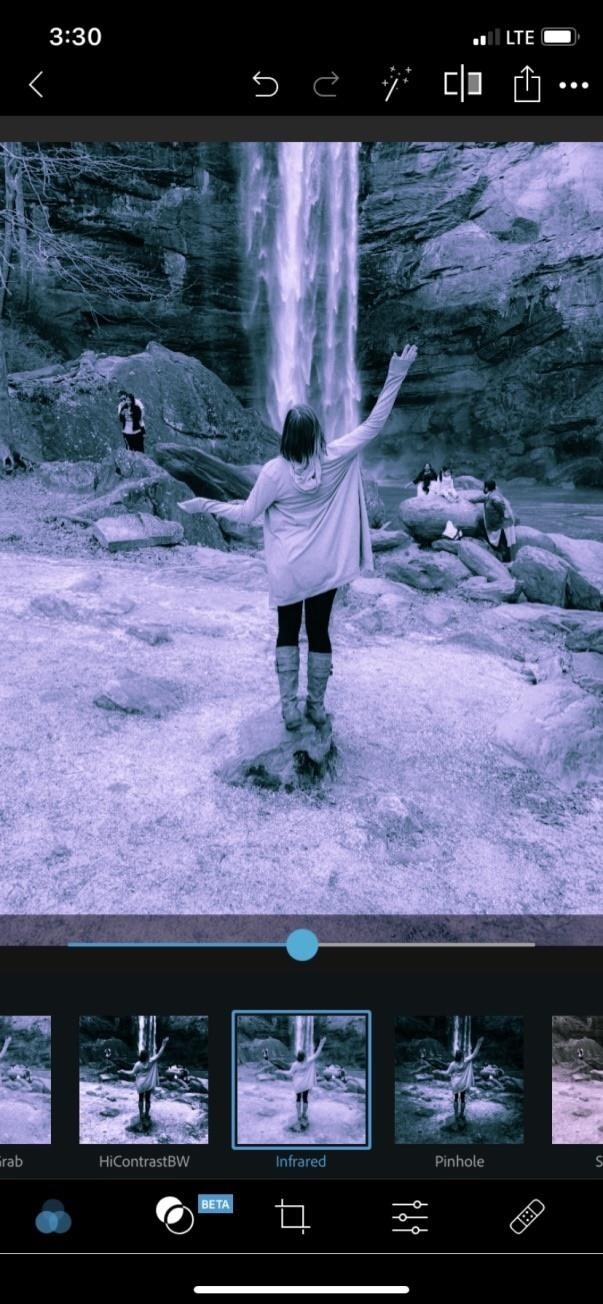
"True" split toning begins with a black and white image. The best way to change your image is to use a filter from your filter gallery. Adobe calls filters "Looks" in PS Express. Select the black and white filter "Infrared" to get the best effect with split toning.
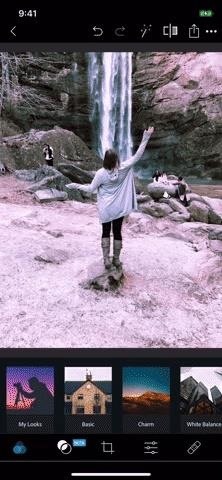
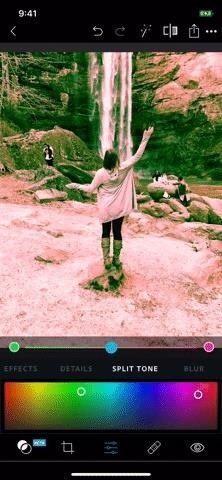
After changing your photo to black and white, tap the adjustments tab (the sliders icon) at the bottom, scroll over until you've reached "Split Tone," and select it. You'll see the color picker appear between the image and toolbar. The two colors on opposite ends of the slider should be gray by default, but you can use the selectors on the color graph to change each one to your selected color scheme. Whatever you choose, those will be your split tone colors.
The higher the dot is on the color picker, the more intense the brightness of your color will be. Drag the dots toward the bottom of the color picker for a more muted tone. If you would like to choose only one color, drag one of the dots to the bottom of the color picker to turn it off and move the other dot to the color of your choice. You can also use the sliding bar above the color picker to turn up or down the intensity of colors.
Method 2: Start with a Full-Color Image
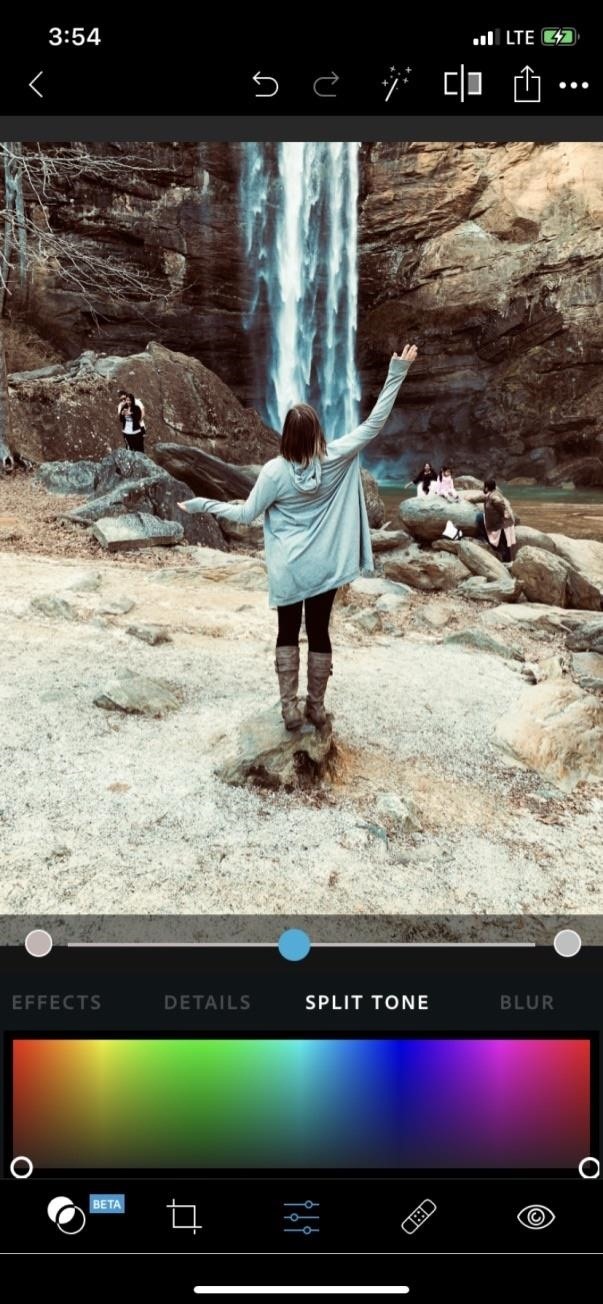
You can also start with a colored image. If you choose this method, the first thing you need to do is balance your image to make sure the lights and darks don't overtake one another. This will make your split toning more effective.
Next, just like with the black-and-white method, scroll over the adjustments menu in the toolbar until you've reached your "Split Tone" panel, and select it. Again, based on the color scheme you've chosen, move the dots around on the color picker, as well as the dot on the slider, until you've reached your desired effect.
Split toning can be stacked on top of other effects to create an even deeper cinematic feel. Don't be afraid to experiment with a different type of effect after you split tone your image. You can put an additional filter over the top of your image from your "Looks" panel, or you can continue to play with the lighting.
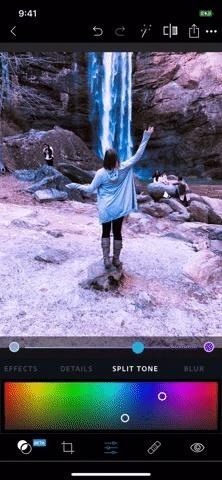
You can also save split tones to your "My Looks" filter category and use the same one over and over again. When you're finished with split toning, don't forget to save your image so you don't lose any edits.
Just updated your iPhone? You'll find new emoji, enhanced security, podcast transcripts, Apple Cash virtual numbers, and other useful features. There are even new additions hidden within Safari. Find out what's new and changed on your iPhone with the iOS 17.4 update.


Be the First to Comment
Share Your Thoughts